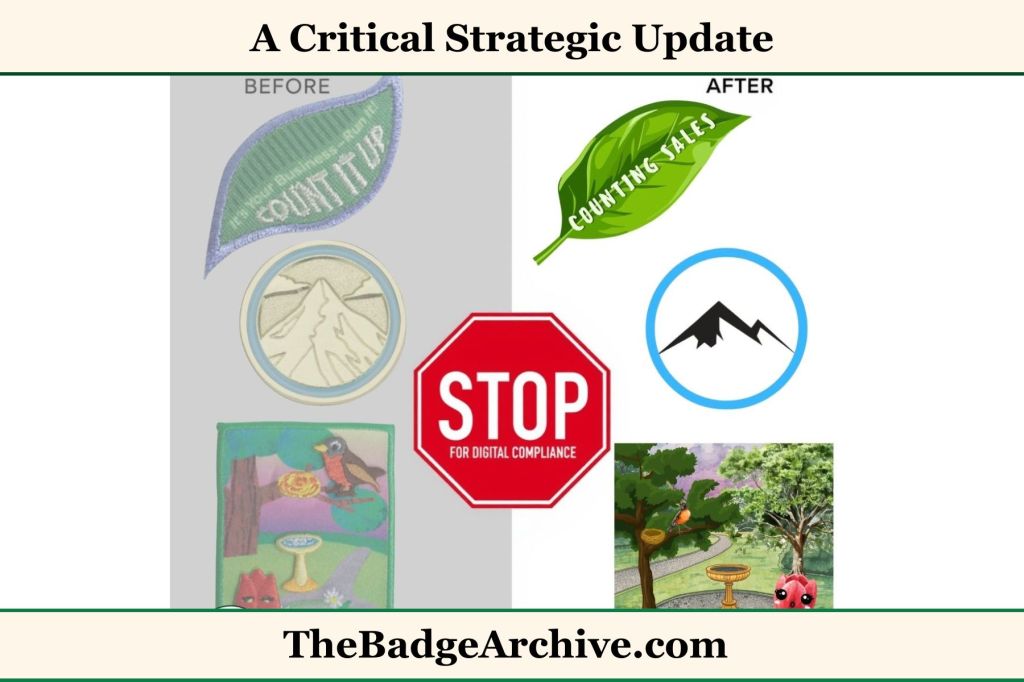
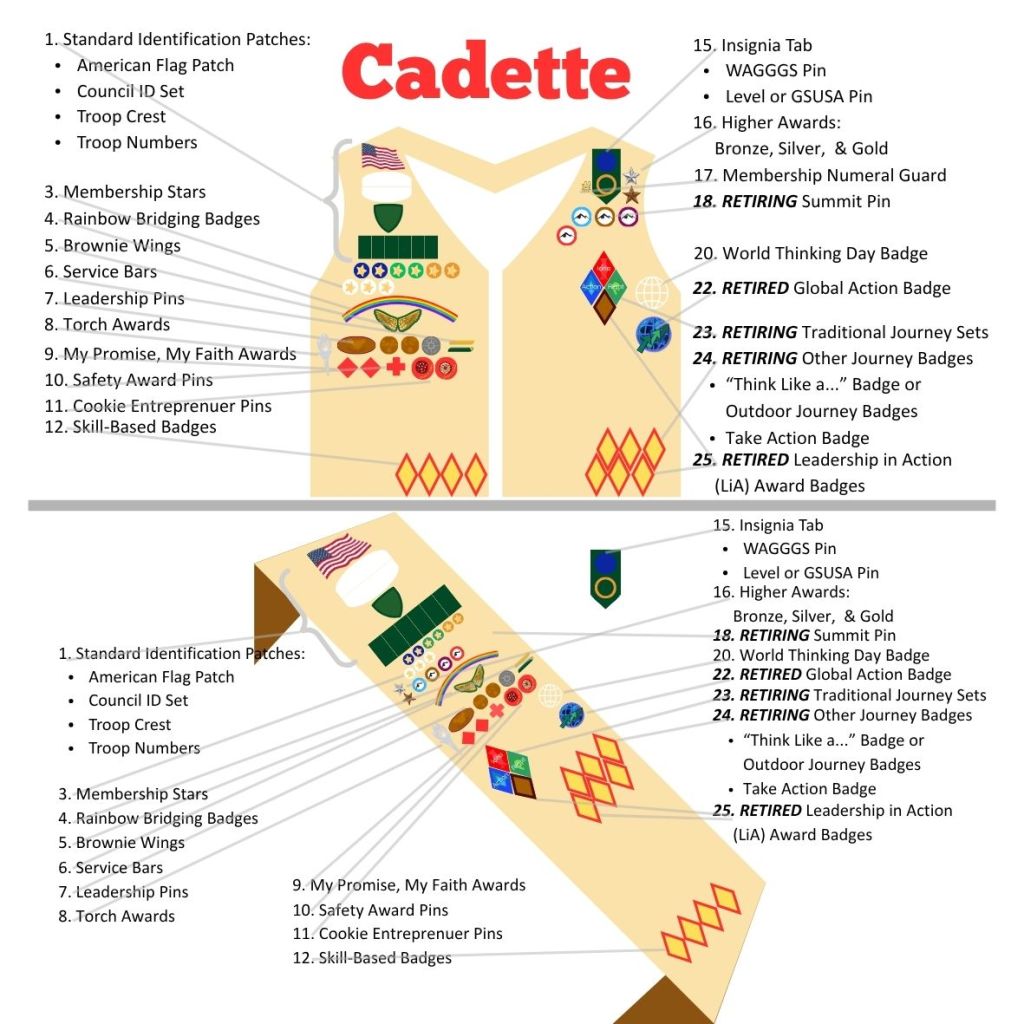
GSUSA officially retired the 2011 Journey program in August 2025, these awards remain optional prerequisites for higher honors until their final phase-out on October 1, 2026, at which point they will be replaced by the new Leadership Awards and Take Action pins.
Journey badges can go where #23 or #24 is stated in the diagram below. The traditional journey sets do not need to be on one side or above and below the other journey badges.
The Outdoor Journey does not have to be in a specific order, or placement. Just place all 4 badges in the same area together. You can place badges as you earn them, you do not have to wait until all 4 badges are earned. If you never earn all 4 badges, these can still be placed on the Journey area of the uniform.
The Think Like a… badges can be placed without the Take Action badge for an incomplete journey and the Take Action badge added next to it later. There is no specific placement or order for these two badges. It is recommended to place them next to each other to show a completed Journey.
It is an option to put Outdoor or Think Like a… badges where #12 (Skill Based Badges) if no Take Action badge is planned. If a scout is not intending to earn the Outdoor Journey at all in the 2 years as a Brownie Girl Scout, it does not need to be placed as a Journey. Placing it there allows the option of earning the full Journey later without having to move the badge later.
It is possible to put only the Take Action badge in the Journey area if the other journey badge was placed in the Skill Based badge area at an earlier time. Do not fret about moving it over, nothing requires you to do so.
C/S/A Badges
If you are using the same tan vest from Cadette level to Ambassador level, be aware that the Cadette badges officially go below the Senior and Ambassador badges. Place the Cadette badges on the bottom hem line of the vest and work upwards as you age through the levels. The Ambassador level badges will be on the top row.
–
Helpful Resource: GS Leader Resources has worked out the best way to maximize badge placement on uniform vests.
–
See the River Valleys Council Uniform page for official images.
–
For More Fun Ideas and Plans

Join the Girl Scout Daisy, Brownie, and Junior Leader Help Facebook Group
(Not an official GSUSA Group)

Join the Girl Scout Cadette, Senior, and Ambassador Leader Help Facebook Group
(Not an official GSUSA Group)

See other Recommended Facebook Groups for some Scouting Organizations
(No official Groups)
–
Click Here -> To see information References:
Disclaimer: The information published on The Badge Archive is built from the references listed below. These sources demonstrate that our content is grounded in facts and research, not opinion or speculation. Readers may consult them directly when looking for additional material.
- Girl Scouts of River Valleys. “Uniform Guide.” Girlscoutsrv.org, 2026, https://www.girlscoutsrv.org/en/members/for-girl-scouts-and-families/uniform-guide.html. Accessed 22 Mar. 2026.
–
- Find out how you can support The Badge Archive!
- Return to the Cadette Badge List.